Git Patch: My favourite little-known feature
I’ve long been an advocate for Git GUI software due to the ease and visualisation they provide in handling advanced Git operations. But perhaps that is only because there are some tips & tricks I did not know about the Git CLI?
Of course I could hold my own in the CLI for basic every-day tasks like adding files, committing to a repository, checking previous commits or even re-writing the commit history. But there was one task which always saw me reaching for my trusty Git GUI.
A messy working tree. This is the situation which would ideally be avoided but all too often becomes a development reality. Each modification to a file since the last commit gets added to your Git working tree until such time as you plan your next commit. In situations where you make changes across several files, your working tree can become unwieldy with changes which:
- you might not remember
- you may not require any more
- should be refactored
- might collectively form one large & disorganised commit
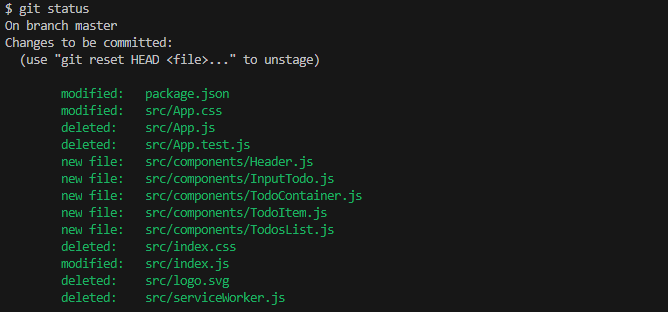
You know you’re in this situation when you run git status and are presented with a lengthy list of files to deal with…
Solution 1 - The Gamble (don’t do this)
One approach which I sometimes see is developers relying on the old faithful git add . which stages the entire working tree (or git add file to stage an entire file) as part of your next commit. Of course, this often isn’t desirable and when the changes are later reviewed (i.e. visualised via a pull request) it results in some of the changes being later removed.

Solution 2 - The GUI
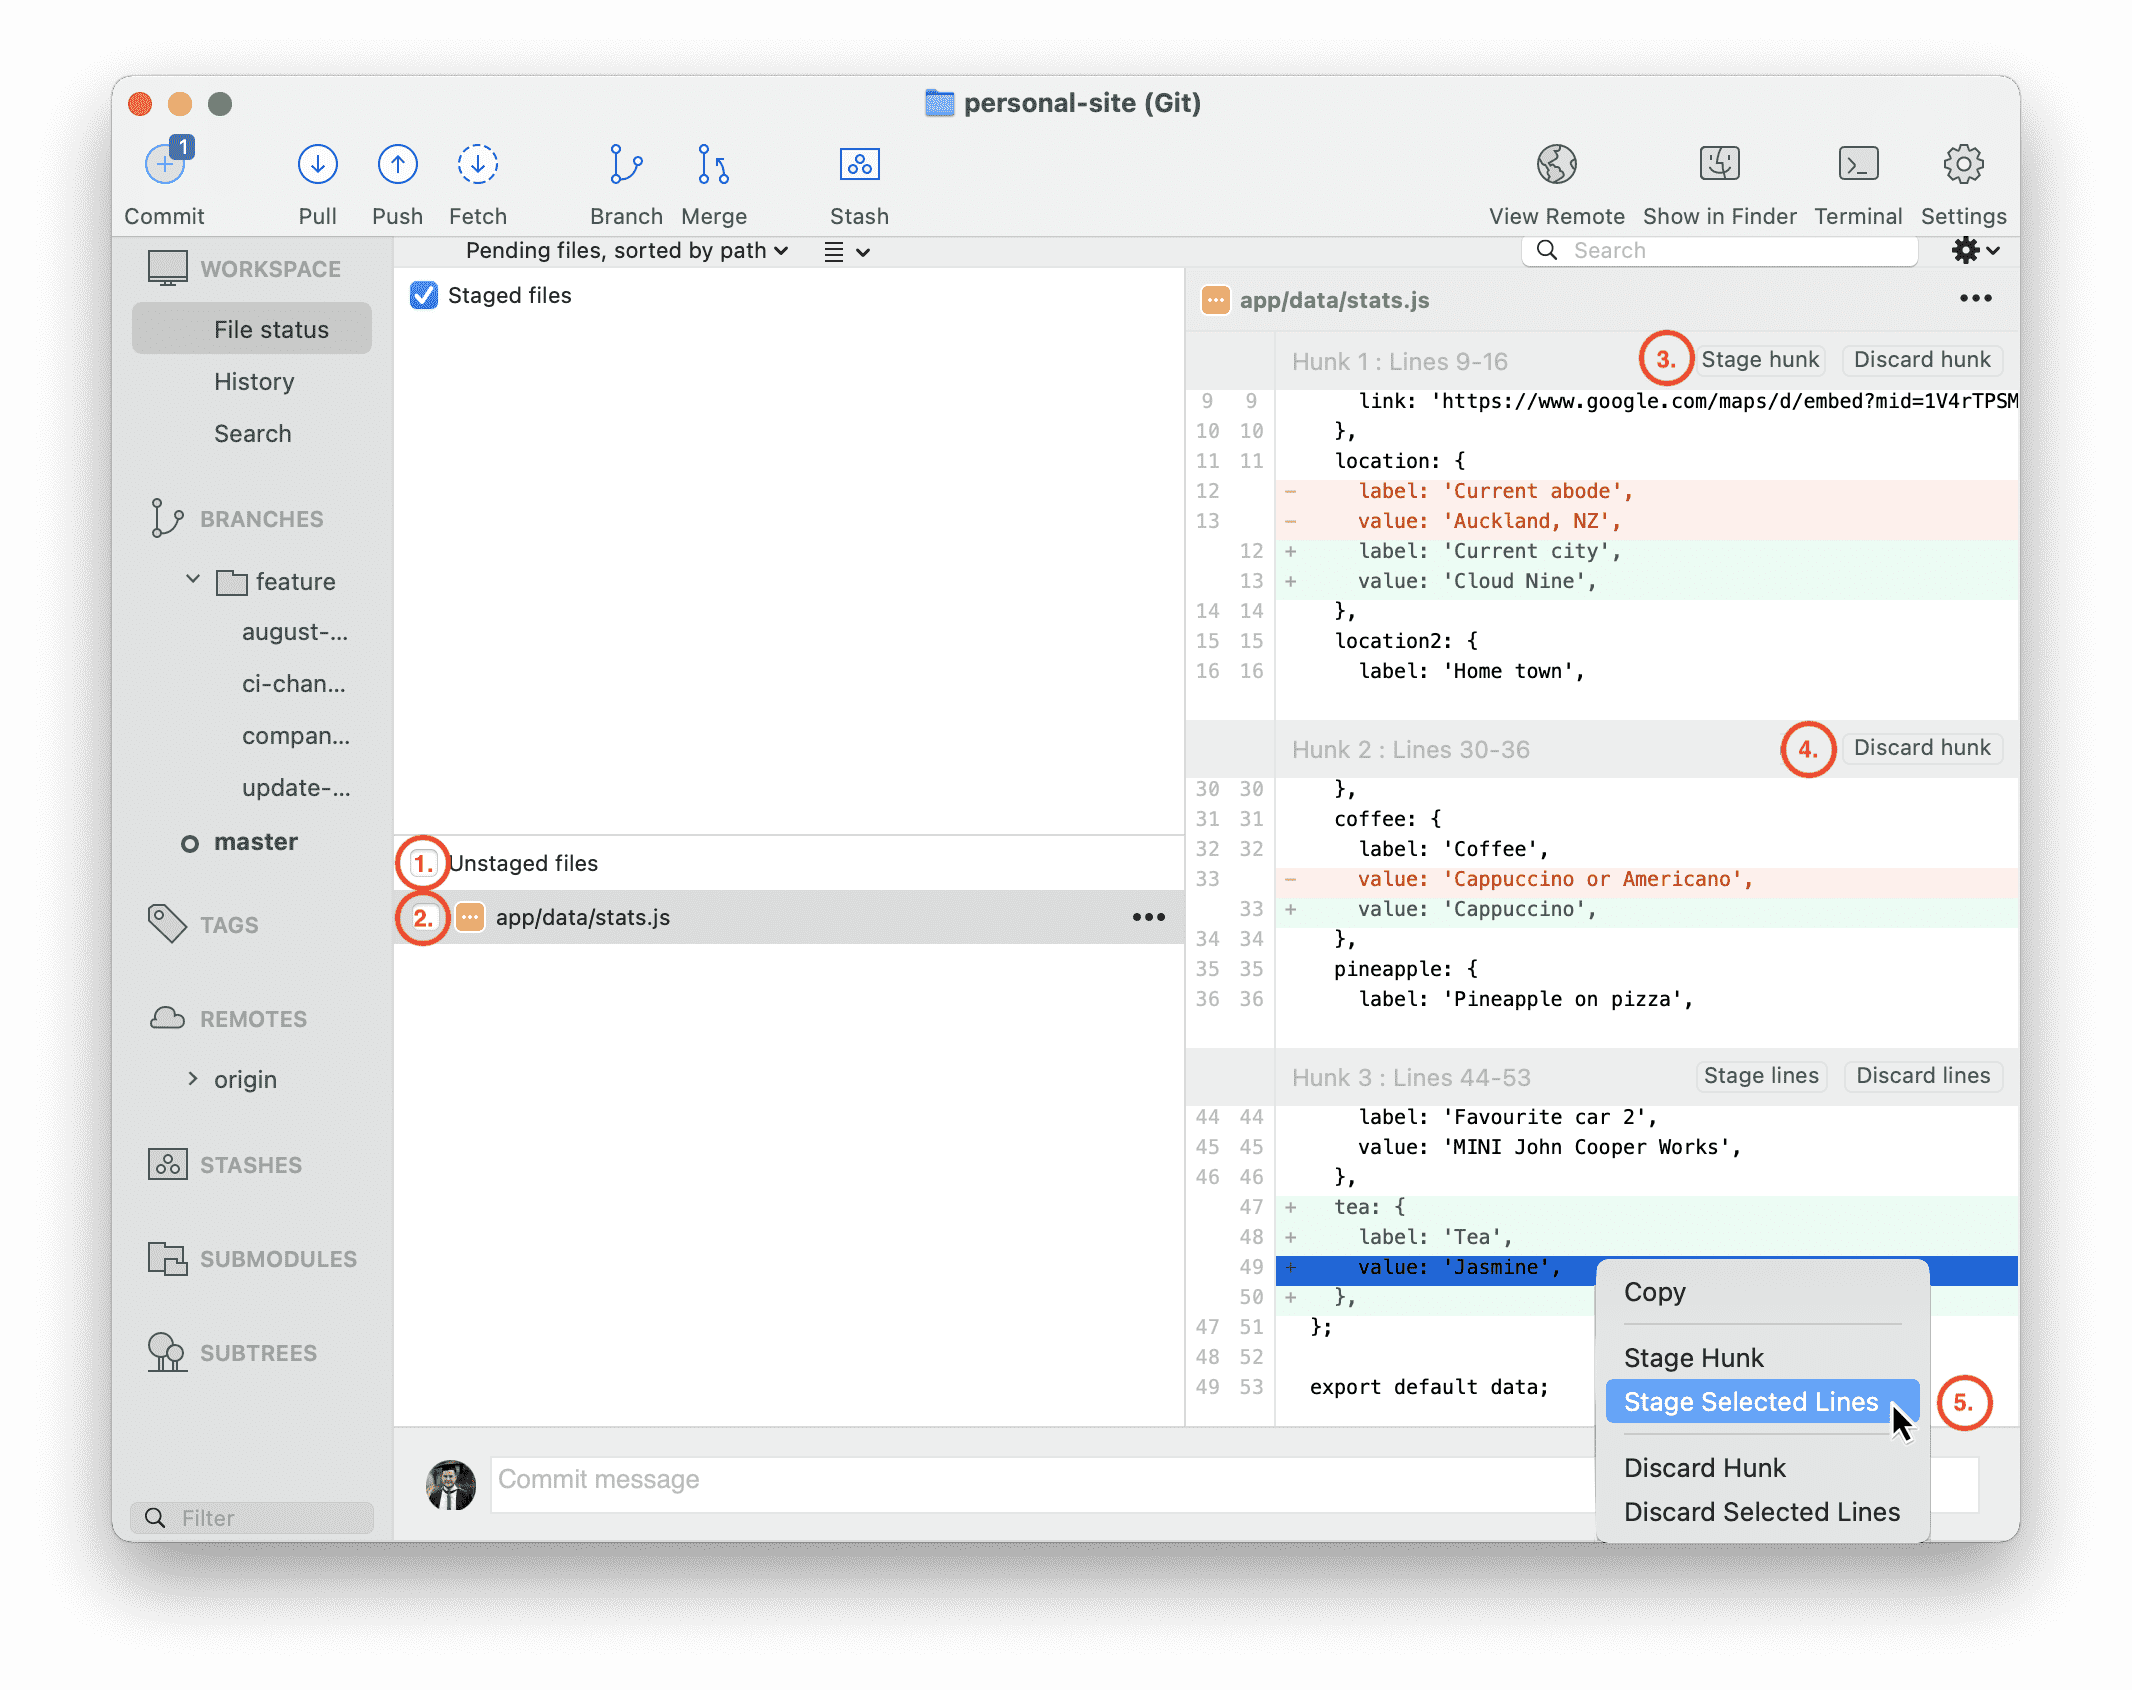
The other approach is my trusty Git GUI. I can see each changed line in a file (colour coordinated) and either:
- stage my entire working tree
- stage entire files
- stage individual hunks
- discard changes which are no longer desired
- stage individual lines
In the below screenshot I give an example of how simple this is using my GUI of choice, Source Tree, although most will be similar.
Solution 3 - The CLI patch
This is where my favourite little-known Git CLI feature shows up to save the day. What if I told you, you can do the same as Solution 2 but without a Git GUI? Imagine how helpful that would be the next time you’re helping a colleague on their machine only to find out they dont have a GUI installed…
Introducing the Git Patch
git add --patch
# or
git add -p # for short
When you run the add-patch command, the CLI will step through each hunk of changes and display the diff for you to review. See below:

You’ll notice the diff shown here (1 of 3) is the same as the first hunk which Sourcetree highlighted earlier in the GUI method.
After you review the diff, you can decide how to answer the prompt Stage this hunk?. The most important options are described below or you can find a full description in the Git documentation.
| Letter | Meaning |
|---|---|
| y | stage this hunk |
| n | do not stage this hunk |
| q | quit; do not stage this hunk or any of the remaining ones |
| a | stage this hunk and all later hunks in the file |
| d | do not stage this hunk or any of the later hunks in the file |
| J | leave this hunk undecided, see next hunk |
| K | leave this hunk undecided, see previous hunk |
| s | split the current hunk into smaller hunks |
| ? | print help |
Usually the response is a simple y or n but there are more advanced options available including browsing through the other hunks before returning to an earlier one to make your decision.
The split option is especially helpful if the hunk is too large. You can use this option to break down the hunk into smaller hunks until you can make a decision.
After answering the question the CLI moves on to the next hunk, prompting you again and again until each piece of your working tree has been decided. At which point you are ready to write a sensible commit message and move on with your life. Nice one 👍
But, why?
Firstly, sometimes I get so focussed on the task at hand, I end up accidentally doing many (unrelated) things in one go. Many things which probably should be in separate commits. This is a quick and easy way to stage certain changes into one commit and the rest into a separate commit.
Secondly, reviewing your work as you stage it is the perfect opportunity to conduct a code-review on your own work before you share it with others. I strongly believe in the concept of
“progress over perfection”
and as a result I usually get each piece of my code into a working state and then move onto the next step without applying much polish. I also find my short-term memory is a little average and often forgets about the finer details. E.g. I’m likely to forget that a function I wrote yesterday works fine but could be cleaner or more efficient. Reviewing my own code as I stage it often prompts me to go back and tidy these things up before I commit my work.